You’re enjoying a spirited drive through the winding roads of the countryside when suddenly, you’ve found yourself fighting with the steering wheel to keep the thing on the road. An episode like that will either leave you feeling exhilarated or grappling with the idea that you possibly brushed death.
The scenario described is merely an example of how bump steer may occur but by no means is the most conclusive. With that said, let us look at the definition of bump steer.

What is bump steer?
Bump steer or roll steer is a change in toe angle caused by the suspension moving up and down. Bump steer is built into the geometry of the suspension and steering system and has nothing to do with turning the steering wheel.
The effect of bump steer is for the wheel to toe-in or toe-out when the suspension moves up or down. The toe change or “steering” occurs any time the suspension moves, whether it is from body roll, brake dive or hitting a bump in the road. Bump steer is undesirable because the suspension is steering the car instead of the driver.
What exactly causes bump steer?
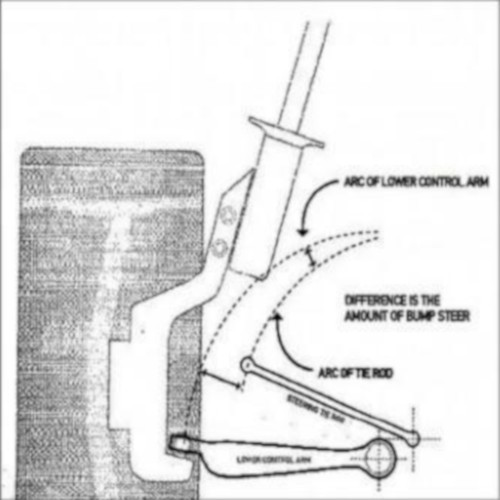
The front wheels do not move directly straight up and down when the vehicle hits a bump. Instead, the wheel follows an arc or curving path that pushes the wheel slightly inward (towards the centerline of the vehicle) or outward (away from the vehicle) in response to vertical wheel movement. The outer tie rod (which connects the steering rack to the wheels) also moves in and out in an arc as it moves up and down. If the rate at which the outer tie rod arcs in and out does not match the rate the wheel moves in or out, the wheel will be turned by the tie-rod. What happens next? You guessed it…bump steer!
Is everyone still with us? Great! Now let’s get into some technical details and investigate how this automotive phenomenon affects the Nissan N15 Pulsar / Almera.
Disclaimer: We are by no means experts and the information provided is based on real-world experience coupled with research.
How bump steer affects the Nissan N15 chassis
On a lowered N15 Pulsar / Almera, with OEM steering setup, it will TOE OUT under suspension bump and TOE IN under suspension droop conditions. This toe change under suspension movement is a result of bump steer and is caused by un-matching arcs of the lower control arm and steering arm.
How do you correct bump steer?
The idea of bump steer correction is to minimize the amount of toe change as the suspension moves through its travel. This can be achieved by raising or lowering the tie rod end and/or steering rack and also by changing the steering arm length.
In 2016, having read about the bump steer and roll center correction for this platform, I tried to follow a similar setup seen on MotoIQ in their
Sentra articles.
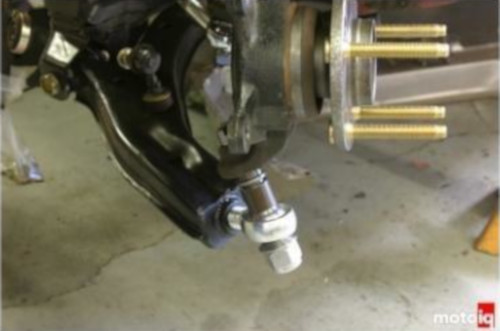
For me though, this consisted of a HARDRACE taller lower ball joint for ‘roll center correction’ and then converting to a rose joint steering end to move the tie rod BELOW the steering knuckle (OEM placement is on top of the knuckle).

The harsh reality
I quickly realized that overall feedback was worse after moving the tie rod below the steering knuckle and this was too far to move the tie rod end. Unfortunately, placing the tie rod end at the bottom does not leave any room to ‘shim’ the tie rod end height backup because the knuckle is in the way.
Now I believe the setup didn’t work for me because the lower ball joint used was not tall enough and did not sufficiently raise the steering knuckle. The MotoIQ ball joint solution looked considerably taller which would explain why they had much better results.
Conclusion:
Placing the tie rod end below the knuckle makes it TOO LOW
Placing the tie rod end above the knuckle makes it TOO HIGH
NOT GREAT!
So, since it wasn’t possible to shim the tie rod end to the ideal height and a taller ball joint wasn’t available, the next plan of attack was to alter the height of the steering rack instead.
If at first you succeed
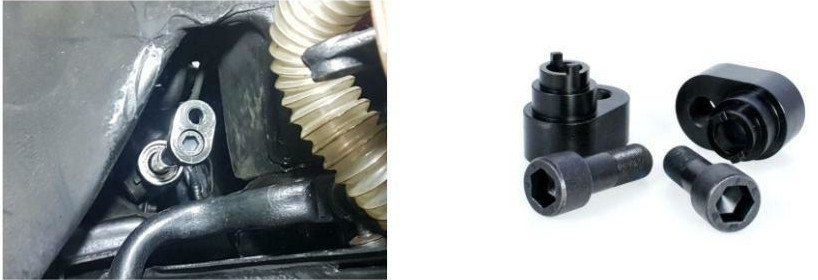
Moving the height of the steering rack assembly proved to be difficult so I used an offset steering rack spacer to go on the end of the rack itself. This raised the INNER steering arm end by 25mm.
The offset rack spacer did two things. Firstly, the width of the spacer (45mm) brought the inner pivot points of the tie rod and lower control arm closer together. Yes, the tie rod had to be shortened to compensate.
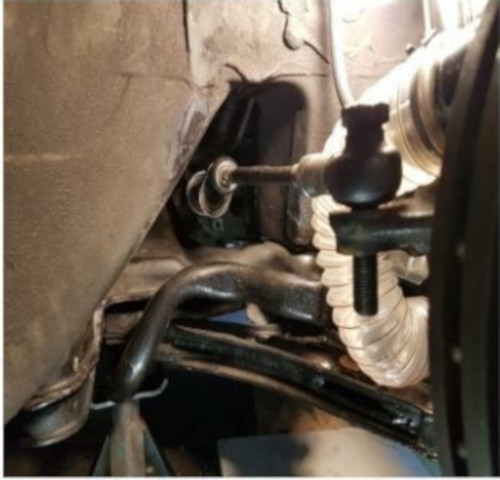
Secondly, the spacer offset (25mm) effectively raised the steering rack; meaning, I could place the tie rod end back in the OEM postion on the knuckle and shim the height to dial in the bump steer. Excellent!
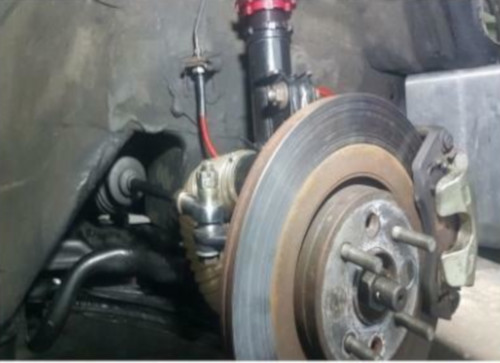
Next up was some testing to find out the ideal shim size to space the tie rod end to the ideal height.
The results are in!
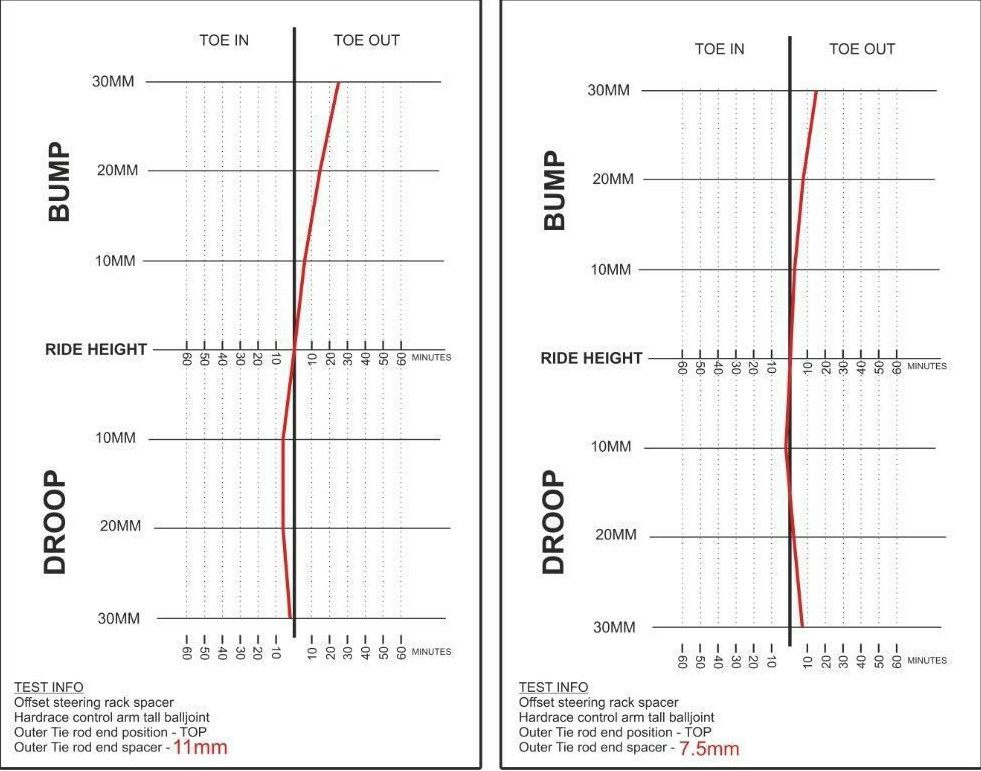
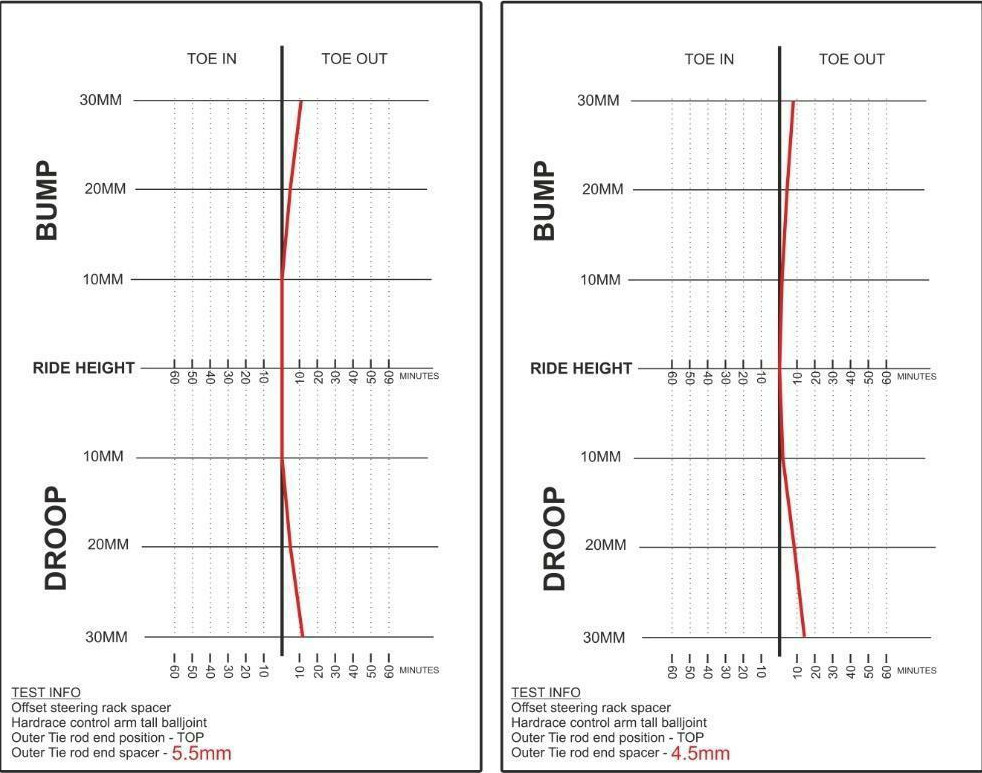
N15 Total Toe Change Range per side
(Full Droop to Full Bump)
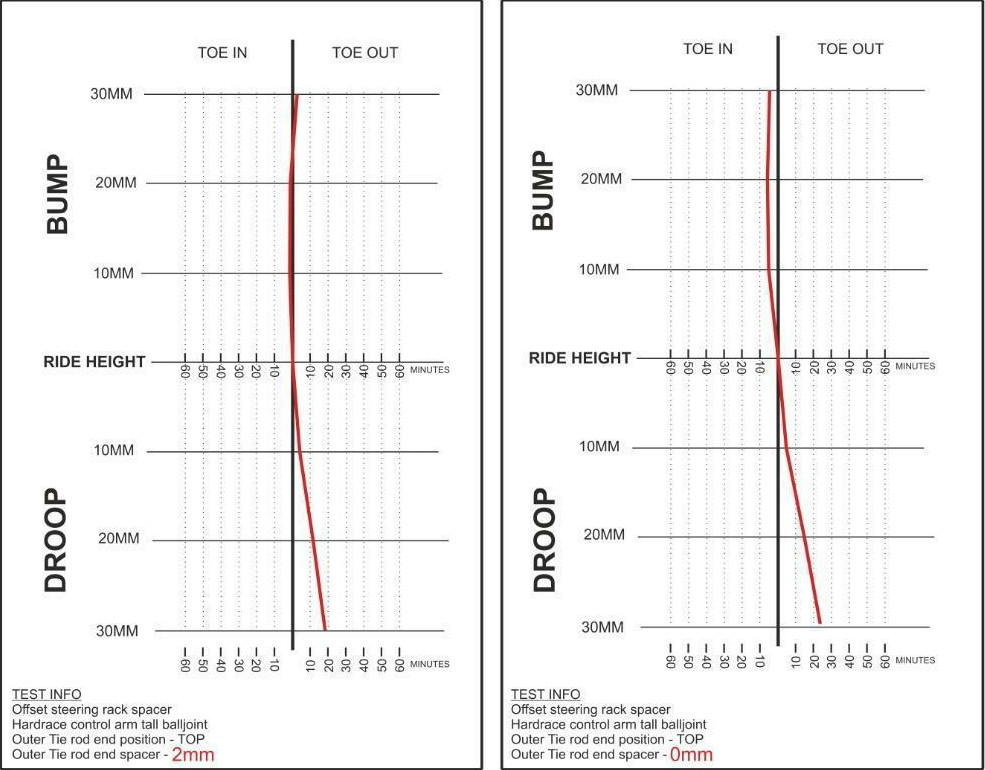
Test Info
*Offset steering rack spacer 45mm length / 25mm height gain
Tie Rod End Position – TOP
Taller Lower Control Arm Ball Joint (HARDRACE)
Extended Lower Control Arm (10mm)
11mm shim – 31′
7mm shim – 17′
5.5mm shim – 12′
4.5mm shim – 14′
2mm shim – 19′
0mm shim – 29′
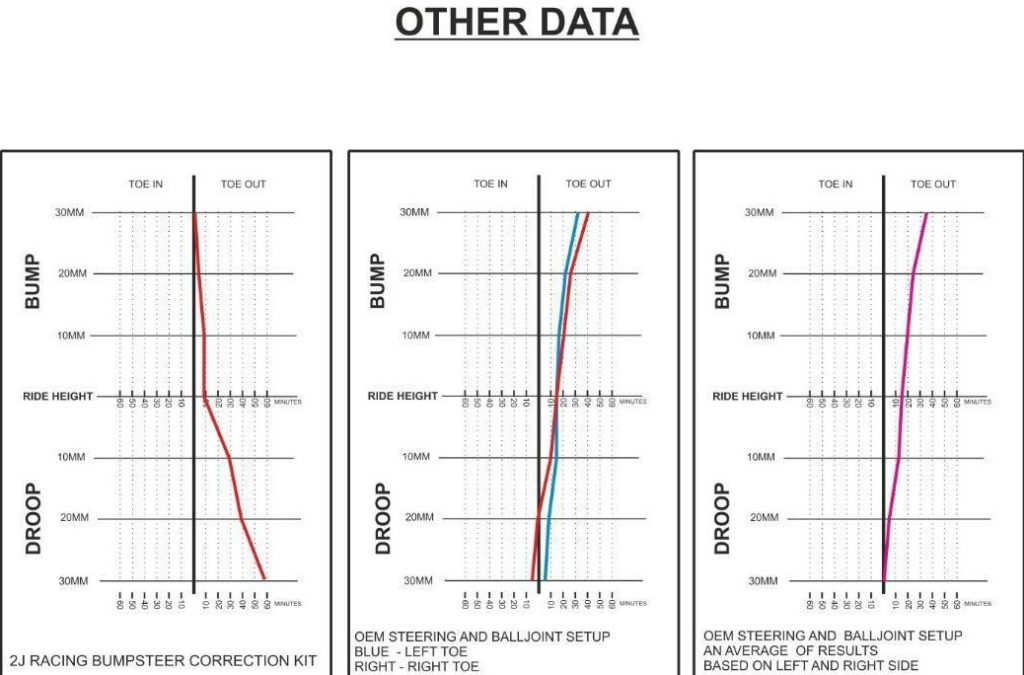
Other data – Provided by Dan Cogswell – Abbey Motorsport
2J Kit – 50
OEM Right – Red – 45′
OEM Left – Blue – 27′
OEM Average – 36′
**OEM data used was inconsistent on each side due to the vehicle being slightly skewed during jacking. An average of the two results should be taken to give a fair representation***
Drum roll please
After doing these tests, I decided to settle on the 5.5mm spacer. You can see bump steer had evened out each side on the bump and droop, giving the lowest overall amount of toe change. You will also notice I have toe out on both bump and droop, this is caused by the length of the steering arm. This could be improved by altering the width of that inner offset spacer. With that being said, I was happy to settle with this result; it’s not perfect but it is a big improvement.
Content provided by Dale Berridge